Tutorial 3 – Polkadot and Cryptocurrencies
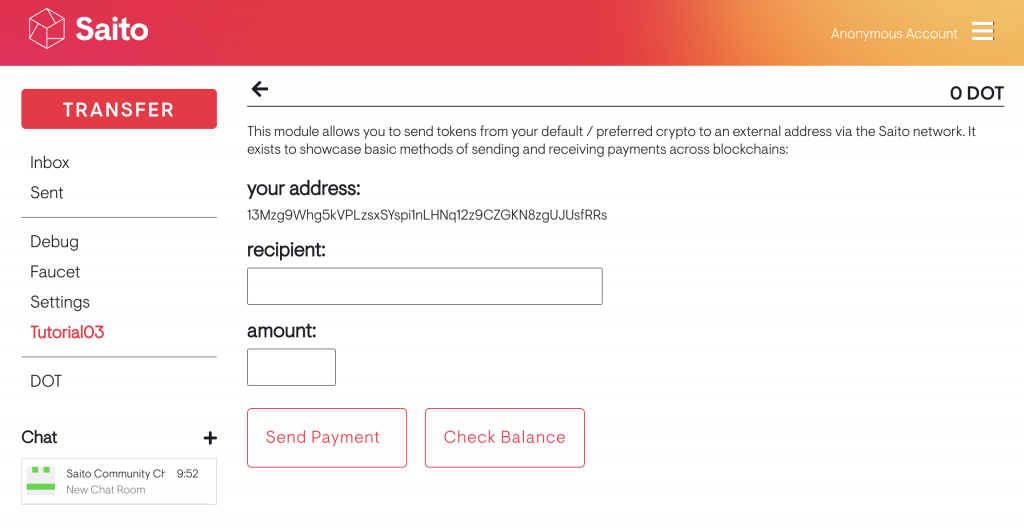
In this tutorial we create a wallet plugin that can send and receive other cryptocurrencies like Polkadot. We explain how to use the /lib directory to handle more complicated user interfaces. And we learn a bit about the standard Saito UI library. As before, we recommend downloading the finished zipfile or walking through our annotated online code. This is what we are building.

Steps
Create your application directory as usual. But this time create a subdirectory called /lib inside your application directory. We put a another subdirectory inside it called “email-appspace”. This is where we will put the code that displays and manages the user-facing parts of our application. You can see this directory contains: a javascript class and a template file that contains the HTML we will insert into the page. We require the javascript file within our application javascript and can now simplify our respondTo function as follows:
  respondTo(type) {
    if (type == 'email-appspace') {
      let obj = {};
          obj.render = function (app, mod) {
            Tutorial03EmailAppspace.render(app, mod);
          }
          obj.attachEvents = function (app, mod) {
            Tutorial03EmailAppspace.attachEvents(app, mod);
          }
      return obj;
    }
    return null;
  }
Look inside /lib/email-appspace/tutorial03-appspace.js and everything should be self-explanatory. render(app, mod) writes our HTML template file into the “email-appspace” space provided. attachEvents(app, mod) then adds interactivity to the elements provided. With more complicated modules this type of code organization keeps our module clean. Our application file handles interactions with the blockchain and peer-to-peer network while UI-facing elements are handled as UI library components.
PRO-TIP: if you look closely at tutorial03-appspace.js you’ll notice that it invokes the class GameCryptoTransferManager. This is one of many standard UI elements available to all Saito applications. You can find them within the /lib/saito/ui directory. Other useful components include modal popups, overlays, the header elements, as well as game-specific components used by the Saito Game Engine. In this case, adding GameCryptoTransferManager gives us access to the non-interactive UI popups that indicate interactions with other blockchains. Feel welcome to customize these UI elements and provide them as part of your module.
Now look at the way that our module is interacting with our external blockchain. These functions are all inside the /lib/saito/wallet.js class – scroll down for the section identified by the “PREFERRED CRYPTOS” header:
app.wallet.checkBalance(address, ticker);

app.wallet.sendPayment(senders=[], receivers=[], amounts=[], timestamp, mycallback, ticker);

async app.wallet.receivePayment(senders=[], receivers=[], amounts=[], timestamp, mycallback, ticker, tries = 36, pollWaitTime = 5000);
Developers can find full document on available wallet-level functions. The important thing to note is that calling these wallet-level functions is blockchain agnostic and identifies chains by their standard crypto ticker-symbols. Many applications like the games in the Saito Arcade are coded so that users can decide for themselves which modules they wish to install and how those cryptocurrency modules work.
Conclusion
In this tutorial, we highlight the generic functions/interface provided in /lib/saito/wallet.js in order to emphasize the flexibility that Saito provides developers. If you have a specific module that you wish to interact with on a lower-level however, you can always fetch the module and deal with it directly. For those interested in Cryptocurrency Module construction and looking to avoid the wallet-interface completely, the parent class for all cryptocurrency modules is available at /lib/templates/abstractcryptomodule.js.
We are continuing to work to improve Saito’s ability to support cryptocurrency applications. If you have any feedback or suggestions please feel very welcome to reach out to info@saito.tech.